Inside the device, a bright lamp illuminates your page while a sensor measures reflected light and turns those readings into pixel data. Software then saves that pixel data as a PDF, JPEG, PNG, or TIFF file.
This explanation suits anyone sorting household records, preserving photographs, scanning office files, or choosing equipment for recurring paper stacks. You’ll see where image quality, searchable text, file size, and storage choices enter the work.
Paper Becomes Pixel Data Before It Becomes a File
A scanned page begins as a raster image, which is a grid of colored, gray, or black-and-white pixels. Your scanner does not recognize a receipt, contract, or photograph as a document during capture. It records the pattern of light and dark areas across the paper surface.
That pixel grid becomes a usable digital file after the scanning software assigns a format. You can save a page as a PDF, JPEG, PNG, TIFF, or searchable PDF, depending on how you plan to store or use it. A clear image can still resist text search until Optical Character Recognition adds a text layer.
Capture Devices Handle Different Paper Conditions
The device you choose affects paper handling before software enters the picture. A Flatbed scanner keeps your original still beneath glass, while a sheet-fed scanner pulls loose pages past its sensor. Your choice matters most with fragile photos, curled receipts, bound books, and multipage records.
- Flatbed scanner: You place delicate photos, books, receipts, or irregular originals flat against glass without bending them.
- Sheet-fed scanner: You feed loose pages through an Automatic document feeder (ADF) for faster batch capture.
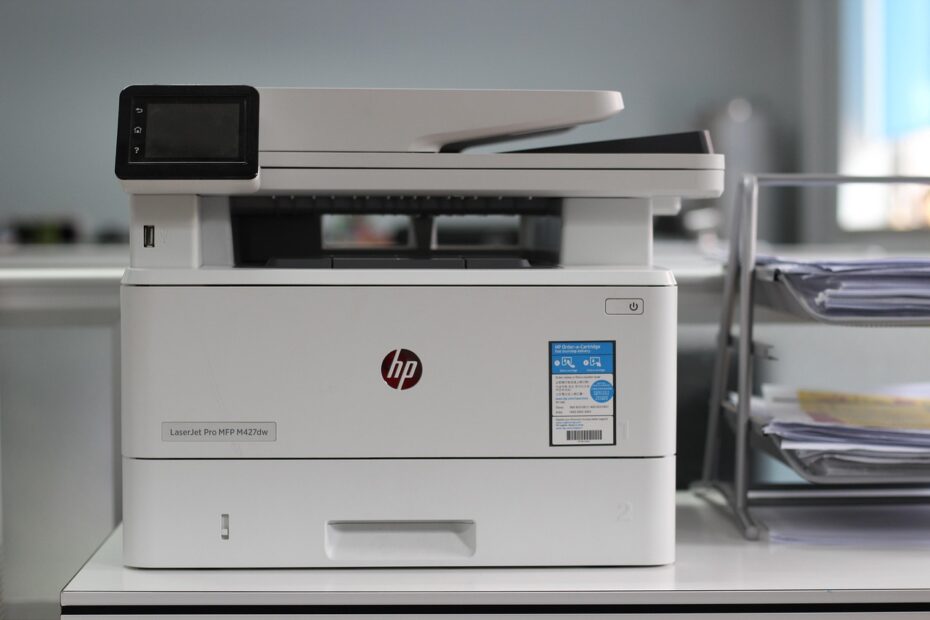
- Multifunction printer: You scan occasional household paperwork from a printer already near your desk.
- Phone camera: You capture a low-risk page in even light, then crop and straighten it with a scanning app.
A scanner for digitizing documents works best when its paper path matches the condition of your originals. Smooth invoices move well through rollers, while a cracked family photograph belongs on glass. Those handling differences lead directly to the light-and-sensor work inside the device.
Light and Sensors Turn Reflections Into Digital Images
A lamp or LED strip shines across a narrow area of your page, and the paper reflects part of that light back toward the scanner. White paper reflects more light than dark ink. Colored photographs reflect different red, green, and blue values.
Each Scan Follows a Measured Capture Sequence
- Position the original: You place a page on glass or load loose sheets into an Automatic document feeder (ADF).
- Light the page: A moving lamp or fixed LED array illuminates a thin strip of paper.
- Collect reflections: Mirrors and lenses, or close-range optics, direct reflected light toward the sensor.
- Read the signal: The image sensor records light levels across the strip as electrical charges.
- Digitize readings: An analog-to-digital converter assigns a numeric value to each sampled point.
- Assemble the image: Software joins thousands of sampled lines into a complete page image.
The analog-to-digital stage changes reflected light into numbers. Dark letters produce lower light readings than white paper, and the converter records that difference as pixel values. Higher bit depth stores more possible values between black and white or within each color channel.
For example, a black-and-white invoice scanned at 300 DPI becomes a dense map of sampled dots. Software packages that map into a PDF or image format after capture ends. Your sensor type and the way the paper moves through the machine shape the next part of the result.
CCD and CIS Sensors Affect Depth and Paper Handling
Two sensor families appear in document scanners: the CCD sensor and the CIS sensor. A charge-coupled device, or CCD sensor, uses mirrors and lenses to carry reflected light to its sensing element. A contact image sensor, or CIS sensor, sits close to the original and uses a compact LED array.
| Sensor or paper path | Capture method | Practical result |
|---|---|---|
| CCD sensor | Reflected light travels through mirrors and a lens. | You get stronger depth tolerance for curled pages and thicker originals. |
| CIS sensor | The page sits close to LEDs and the sensing strip. | You get a slimmer device with lower power use, though depth tolerance is limited. |
| Flatbed path | The page stays still while the sensor carriage moves beneath glass. | You protect photos, book spreads, and fragile papers from rollers. |
| Sheet-fed path | Rollers move each sheet past a stationary sensor. | You handle multipage stacks quickly when pages are loose and smooth. |
Color capture records red, green, and blue channel data for every sampled area. The scanner combines those values into a color pixel. Your faded blue form can remain distinct from a gray paper background because the sensor retains channel differences.
Keep curled thermal receipts, torn originals, and fragile paper out of a fast feeder. A flatbed pass takes longer, yet it avoids jams and missing fragments.
Physical capture supplies the image, but Resolution (DPI), color mode, and compression decide how much detail stays visible in the saved file. Your settings should reflect the smallest text, marks, or image detail you need to preserve.
Resolution and Image Settings Control Detail and File Size
Optical Resolution (DPI) describes the physical detail your hardware samples per inch. A 300 DPI scan records 300 sample points across each inch of paper. Interpolated resolution stretches existing data through software and does not add detail the sensor never recorded.
| Record type | Starting setting | Reason |
|---|---|---|
| Text documents | 300 DPI grayscale or color | You keep normal print legible while limiting storage growth. |
| Small print | 400 to 600 DPI | You retain legal text, serial labels, and fine annotations. |
| Family photographs | 600 DPI color | You retain more detail for cropping or careful image work. |
| Email copy | 150 to 200 DPI | You reduce attachment size after preserving a higher-quality master. |
Higher optical DPI captures finer edges, yet it also adds scan time and storage use. A letter-size 600 DPI color image can occupy several times more space than a 300 DPI grayscale version. Use the extra detail where your original contains small print, texture, or visual information worth keeping.
Processing Settings Change What Stays Visible
Color depth controls how many shades each pixel stores. Deskewing straightens a crooked page, cropping removes the platen edge, and background cleanup lightens dingy paper. Your faint pencil notes or pale stamps can disappear under aggressive cleanup settings.
File compression reduces storage by encoding image data more efficiently. JPEG suits photographs but can blur fine text at heavy compression settings. PDF compression fits routine document sharing, while TIFF uses little or no lossy compression for preservation work.
Scan one page at your selected settings and zoom to 200 percent before running a 300-sheet batch. Soft text and clipped edges are easier to correct before the full stack enters the feeder.
After your image looks right, the scanning software turns the pixel grid into a file you can name, store, and retrieve. That handoff also determines whether your page stays image-only or gains searchable text.
Scanning Software Packages Images Into Usable Files
A scanner sends line data to software rather than a finished document. Capture software assembles those lines, finds page edges, rotates upside-down sheets, removes blank backs, and separates mixed stacks into individual files. Your export settings decide which corrections remain in the finished copy.
Adobe Acrobat can assemble scanned images into PDFs and add text-recognition tools. PaperStream Capture Pro, used with Ricoh fi Series equipment, focuses on high-volume capture and sorting rules. Folderit and similar Document management system tools focus on filing, permissions, and retrieval after the scan exists.
| File format | Strong use | Trade-off |
|---|---|---|
| Multipage records, email sharing, and consistent page layout | Your file can hold images only until text recognition is added. | |
| JPEG | Photographs and compact image sharing | Repeated edits can reduce image quality through lossy compression. |
| PNG | Graphics, diagrams, and sharp text snapshots | Color photo files can become larger than JPEG files. |
| TIFF | Archival image masters and preservation workflows | Files use substantial storage and feel awkward for casual email. |
A PDF is a container, not proof that the words inside it are searchable. Your PDF can contain page images alone, or those images plus a hidden text layer. Optical Character Recognition creates that layer and brings useful limits with it.
OCR Makes Text Searchable Without Replacing the Image
Optical Character Recognition analyzes pixel patterns that resemble letters, numbers, words, and lines. It places recognized text behind or beside the scanned image, allowing you to search, select, copy, or index words inside a searchable PDF.
Your scanned image remains the visual record. OCR does not reproduce every font, table border, signature, or handwritten note as editable text. A search for an invoice number can work well, while a two-column contract needs close review before you rely on extracted wording.
Recognition Errors Follow Visible Paper Problems
- Handwritten notes: Your cursive additions and rushed signatures produce uncertain character matches.
- Faint ink: Pale carbon copies can merge with paper texture before the software identifies letters.
- Skewed pages: Angled lines disrupt word spacing and column boundaries during analysis.
- Unusual fonts: Decorative typefaces can confuse O, 0, l, and 1.
- Damaged originals: Torn edges, stains, and folds can interrupt names, dates, and account strings.
Review high-stakes fields against the visible image before relying on extracted text. Your name, date of birth, account number, tax figure, and signature line deserve a human check. OCR speeds retrieval, but it does not prove accuracy.
That review belongs near the start of your filing routine, while the original stack is still nearby. A small trial batch exposes capture problems before a folder fills with hundreds of files.
Testing a small batch first lets you refine the routine before fragile or high-volume records raise the stakes.
A Home Workflow Keeps Paper Records Searchable and Organized
A 20-page trial run reveals more than an afternoon spent scanning a full archive. Start with one record type, such as medical statements or tax forms, and inspect every page image. Your early corrections stop repeated filing mistakes later.
- Prepare the pages: Remove staples, unfold corners, sort record types, and set fragile originals aside for flatbed capture.
- Run a sample: Scan 10 to 20 sheets, including double-sided pages, at your selected resolution and color mode.
- Inspect the output: Check your files for missing backsides, clipped margins, crooked text, duplicates, and unreadable areas.
- Name files consistently: Use a date-first pattern such as 2024-04-15_BankStatement_Checking.pdf for easy sorting.
- File by purpose: Separate tax, health, home, work, and family-history records into stable folders.
- Keep two copies: Store a primary folder plus Cloud storage or encrypted external storage in a separate location.
Your retention rules should match the record rather than the scanner. Keep the paper original until you verify legibility, page count, and file location. Sensitive files also need strong account passwords, limited access, and device encryption where available.
Paper disposal comes after verification rather than during capture. Shred records with account details or identity data only after your backup file opens correctly. That sequence is a practical answer to how to digitize paper documents without losing track of the original record.
A sound routine still has to accommodate the paper’s condition and the size of the job.
Record Condition and Volume Determine the Right Method
A Flatbed scanner remains safer for photographs, bound books, fragile certificates, and irregular pages. Your original stays still, so rollers do not pull it through the device. A sheet-fed scanner suits recurring stacks of clean, loose paperwork.
| Situation | Method | Practical fit |
|---|---|---|
| Photo album or bound book | Flatbed scanner | You protect delicate surfaces and capture uneven originals carefully. |
| Monthly paper stack | Sheet-fed scanner | You capture double-sided forms quickly through an Automatic document feeder (ADF). |
| One-page receipt | Phone scan app | You capture a short-lived, low-risk record without desk equipment. |
| Archive backlog | Document scanning service | You shift preparation, indexing, and oversized handling to a trained team. |
Document scanning services fit large backlogs, oversized drawings, damaged archives, or indexing work that would occupy staff for weeks. Pricing varies with page volume, paper condition, preparation, indexing fields, image quality, and secure handling requirements. Ask for written details about file naming, return handling, and storage controls.
Your final choice rests on volume, image quality, searchability, security, and retention needs. The best way to digitize paper documents is the method that captures required detail without making your filing system harder to trust. This is how scanners convert paper to digital files that remain useful years after the paper leaves your desk.
Key Points for Reliable Digital Records
Your paper becomes a digital record through physical light capture and software choices. Set resolution for the detail you need, preserve the original image, use OCR for retrieval rather than unquestioned transcription, and keep two verified copies. Your files matter only when you can find them, read them, and trust that every page arrived intact.
FAQ
How does a scanner convert a paper document into a digital file?
A scanner shines light onto the page and measures reflected light with a CCD sensor or CIS sensor. An analog-to-digital converter changes those readings into pixel values. Your scanning software then saves the pixel image as a PDF, JPEG, PNG, or TIFF.
What components inside a scanner capture text and images?
Your scanner uses a lamp or LED array, mirrors or close-range optics, an image sensor, and an analog-to-digital converter. The sensor reads reflected light line by line. Software assembles those lines into the page image you save.
What is the difference between a flatbed scanner and an ADF document scanner?
A Flatbed scanner keeps your page still on glass while a moving sensor captures it. An ADF document scanner moves loose pages past a fixed sensor with rollers. Flatbeds suit fragile or bound items, while an Automatic document feeder suits repeated stacks.
How does OCR make a scanned document searchable or editable?
OCR analyzes image pixels that resemble letters, words, and lines. It adds recognized text behind or beside your scanned image, allowing word searches and text selection. Your visible scan remains the record, so verify names, dates, figures, and signatures against the image.
Can you scan a paper document and save it as a PDF?
You can save a scanned page directly as a PDF through scanner software or a phone scanning app. Your PDF can contain one page or many pages, and it can include a searchable text layer after OCR processes the captured image.
What DPI should you use when scanning documents, photos, and receipts?
You should start at 300 DPI for routine text documents, bills, and forms. Use 400 to 600 DPI for tiny print, detailed diagrams, receipts with small type, or photographs that need close inspection. Higher settings add scan time and storage use.